Monday, January 26, 2009

We're Finally Finished!


About 15 months ago Tom and I decided it was time to tear down our ugly fake-brick fireplace wall, seal up the fireplace better so we couldn't smell our downstairs neighbor's cigarette smoke, and paint and tile around the fireplace. 


We started the project on Saturday on a whim, annoyed by all the smoke we were smelling that particular morning. After a few awesome hours of swinging a sledge hammer and axe in the living room, there was dust EVERYWHERE and piles of stucco-stuff and wire that needed to be carried out to the dumpster. After many trips in and out, the mess was gone, and we used the shop-vac to collect a lot of the dust. Tom pulled out the framing around the fireplace, and we were shocked to find a case that went from the top unit all the way down to the ground, just open with a couple stove pipes traveling through. The air in there was nasty, so we quickly blocked the kitties off (they saw a perfect hunting ground), Tom sealed the back of the fireplace up and stuck the wall back in around it, and sealed it up extra well. Over the next couple days we got new drywall up, then taped and mudded and sanded it... more dust again! I painted the wall a dark royal blue color, and Tom put up the cement backer board. (Sorry the pre-project pictures are a little odd, but those are the only pictures I can find that even have the old brick in them from the previous 2 years of us living here!)


I'd been thinking for a while that I would like to tile around the opening, but kept getting discouraged by the price and skill it looked like it would take. Finally this past September I collected all the tile I wanted to use from various stores and sales, and laid out my design on some latch hook rug canvas cut exactly to the size of the backer board. This was a huge help in centering and spacing, since i could work on it gradually on the floor. I used tacky glue to stick each piece to the canvas, marked the pieces I needed cut, and eventually cut the canvas into 5 chunks. (I could just see it sliding off the wall once we stuck it to the wet mortar in once huge piece!) It held well and set quickly. 

Wednesday night, 4 months after sticking the tile to the wall, we finally mixed the grout and smothered it in place. Sponging off the tiles was a long job, and it ended up grinding our hands raw from the grit in the grout, but it's finished!


Tuesday, January 20, 2009

Earrings


I've ventured back into the beading world, after not doing much with beads for over a year! At first I thought I would not make a great beader because I don't really like seed beads, but I've found some beautiful glass and vintage beads in shops and on etsy. I have a basic idea of how to use wire, but am still waiting to get into a class at the beadclub in Woodinville. I've made about 5 pairs of earrings in the past couple weeks, and have ideas for many more! Some of these earrings I've listed for sale on etsy already. :)


Sunday, January 18, 2009

A is for Apron


I finished an apron today that I started a few days ago, but that I've had the fabric for since before Christmas! I had ordered the book A is for Apron from half.com, but the first sale fell through, so I had to wait over a month to get my refund and re-order from a different seller. Finally, it came about 2 weeks ago and I took it into Kinko's to get the patterns enlarged. There are so many cute aprons in the book, too bad you only have to wear one apron at a time! 

I learned a new technique for this project... continuous bias binding tape! I needed 6.5 yards of it, and the lady at the quilt store told me a fat quarter would be enough, but I was skeptical. This tutorial helped me through the process, and it was about 3 yards too much! Once I had the bias tape all cut, I used one of these little Clover gizmos to shape and iron. Tom thinks it's one of the coolest crafting tools I have. 

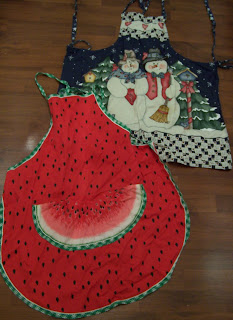
Now I have this cute retro looking apron, made with some cute "chair of bowlies" Mary Engelbreit fabric, and I can toss the 2 worn and scratchy pre-printed aprons that I made in junior high... yes I'm even getting rid of the watermelon apron that I wore at our wedding over my dress so I could have lunch! I think it is quite fitting that this apron is called "The Lorelai," especially since I watched a few episodes of Gilmore Girls while working on it!

Monday, January 12, 2009

A Set of Cards

I made a few more cards, that I was hoping would have a bit of a retro look. I'm not sure they actually came out that way, but at least they're cute!


Friday, January 9, 2009

A Few Valentine's Cards!

I spent the day yesterday making a few valentine's day cards, and even got them listed on etsy! I have a few more ideas that I'm hoping to work on today and post as well. :)


Tuesday, January 6, 2009

A Walk in the Park

Last week Tom and I took a cold walk across the street through St. Edwards Park and around Bastyr. I took a few pictures, and Tom loves this one, and said I should post it. It's kind of funny because you don't realize the scale until you see how big the fir needles are compared to the rocks and plants! Okay, so it doesn't look so amazing unless you click on it and see a larger version, but I can't post any larger on here. :)